Copyright © 2024 Acrovid. All trademarks are property of their respective owners
Support
Products
Resources
About
Sign up for our newsletter to receive
news and special offers


Press/Affiliates
Share


About
About

User Guide
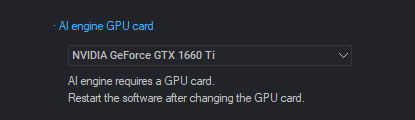
Configuring the GPU card
To configure the GPU card options, open the options dialog and select the GPU card from the detected GPU cards list in the “AI engine GPU
card” section:

Global configuration
Configuration dialog

How to configure neoFootage AI video enhance and upscale
Acrovid,neoFootage AI and SuperBitdepth AI are trademarks or registered trademarks of Acrovid, Vulkan and the Vulkan logo are registered trademarks of the Khronos Group Inc. All other trademarks or registered trademarks like Adobe Premiere, After Effects, Dacinvi Resolve, Avid, Avid Media Composer,
ProRes, DNxHD, GrassValley, NVIDIA, CUDA,Intel, Quicksync or Cineform mentioned in this document are property of their respective owners. Reference herein does not constitute or imply affiliation with our company, endorsement, or recommendation. Some videos on this webpage are from Videezy.com
After changing the GPU card, restart the software.
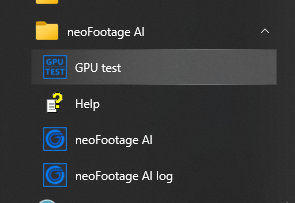
GPU card test program
The GPU Test program check the GPU for compatibility and driver problems.
If you experience any GPU problem or the AI processing runs slower than it should
with your GPU card, please test your GPU and send us the test results.
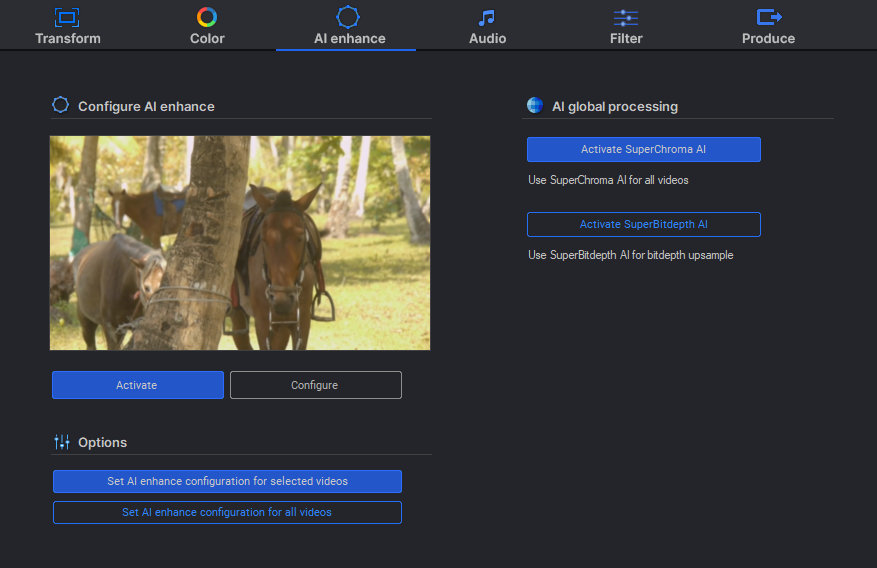
In the AI enhance configuration dialog you can easily configure all the AI engine features.
After activating AI enhance or SuperBitdepth AI, the original and enhanced video can be compared by pressing the left mouse button over the
video, this will show the original video while pressed, or by activating the compare mode, this will show the videos side by side.
You can move the video frame using the mouse, zoom the video using the mouse wheel, or select a fixed zoom.
Previewing the enhanced video and comparing the results
If the video is HDR, the HDR display mode is activated by default, the HDR uses Windows HDR display mode if available, or a HDR simulation.
Click on the HDR button to activate or deactivate the HDR display mode.
HDR display mode
Press the button SnapShot to save a PNG image of the current processed and original video frame.
SnapShot
Configuring AI enhance and upscale
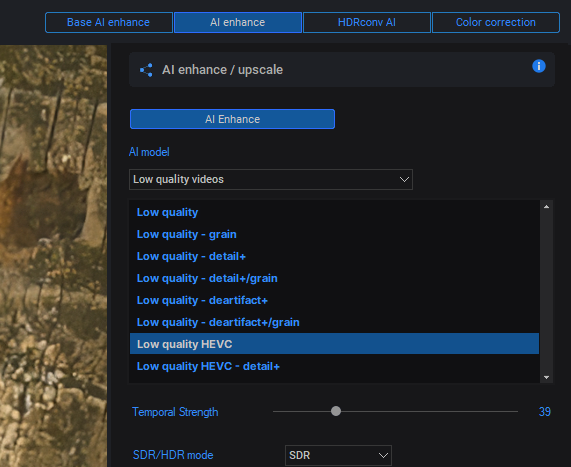
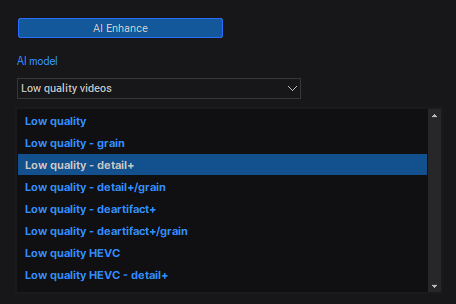
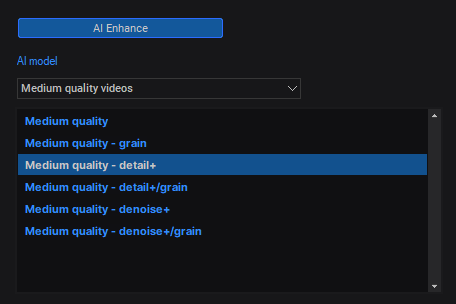
AI enhance features 14 AI models trained for several video conditions.
The AI models are organized in two sections:
- Models for medium quality videos.
- Models for low quality videos.
Check the button “AI enhance / upscale” to activate the processing with the
selected AI model.
After selecting a model, it is loaded in the GPU card, and the current video frame
is processed so the results between models can be easily compared.
The final videos can be improved keeping the source dimensions, or also can be
upscaled or downscaled.
The preview dimensions can be set to source video dimensions, upscale 2X and 4X,
HD or 4K.
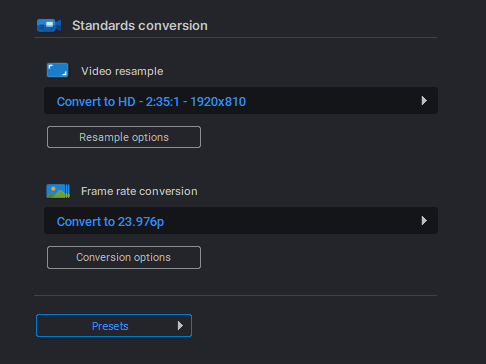
The final video can be scaled to any video standard by configuring the video
resample in the transform panel.
TIP: If “Auto configure” upsample button is activated, then the selected preview
dimensions will be configured automatically in the transform panel.
Preview dimensions and final video dimensions
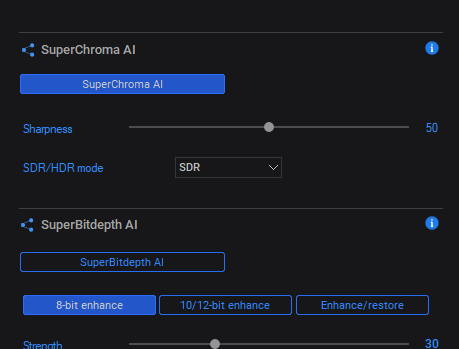
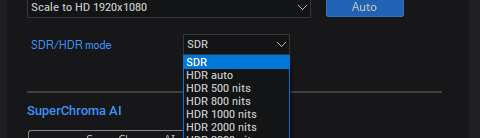
When processing HDR videos, selecting a HDR mode can improve the quality for
HDR videos.
TIP: when selecting a nits mode, all the values over the selected nits will be
removed.
SDR and HDR modes
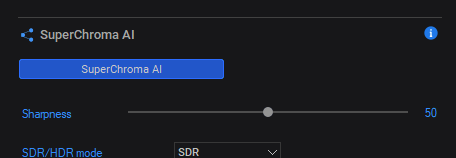
Configuring SuperChroma AI and SuperBitdepth AI
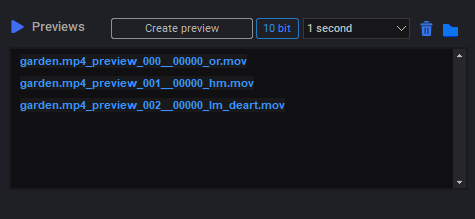
Creating video previews
Video previews can be created using the current AI configuration.
To create a video preview, select the preview duration and press the button
“Create preview”.
The video previews filename include the AI model used.
Check the “10 bit” button to create the preview in 10-bit.
Double click on a preview to play it, for deleting, select the preview and press the
button “Delete preview”.
Press the button “Open previews folder” to open the previews folder in the
Windows explorer.
TIP: the preview player is the internal player by default, you can configure other
external player in the options dialog.
TIP: the preview folder can be configured in the general options dialog.
Configuring color correction
The video can be easily color corrected using the color effects to get a perfect video.
For color correction, select the color correction tab, and apply the color effects, there are available basic and advanced color effects.
Color correction can be done over the enhanced video frame, with AI processing activated or not activated.
TIP: When doing white balance correction, it is better to apply the white balance effect first.
TIP: color correction configuration for the video is shared with the configuration in the color tab.
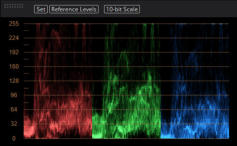
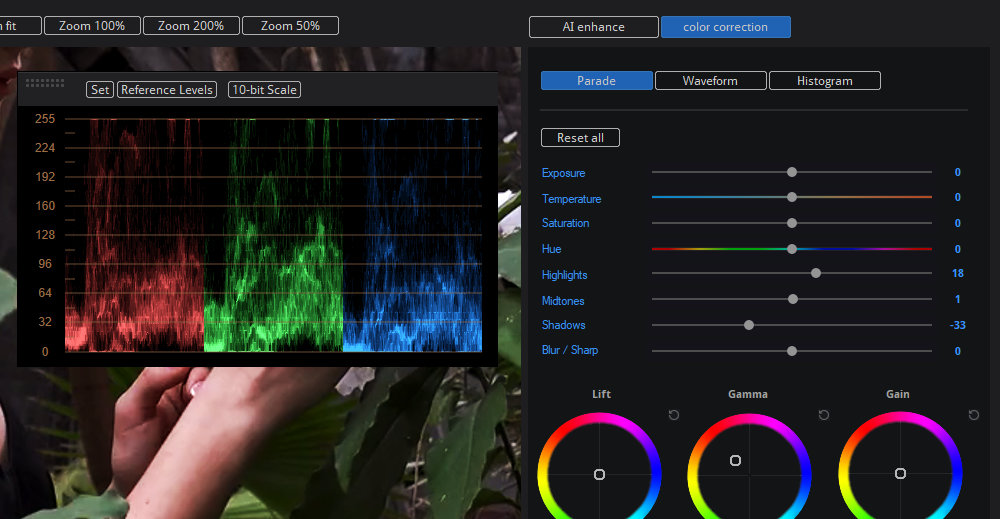
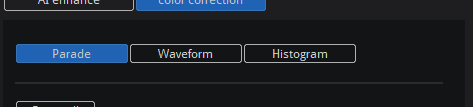
To show and hide the scopes check the buttons “Parade”, “Waveform” or
“Histogram” .
The scopes show the processed video, with all the AI processing settings, and
the configured color correction.
Scopes
Selecting AI models
Configuration with other processing features
AI processing integrates seamlessly with all processing features.
After configuring the AI processing, any other processing setting can be added, for example the video can be converted to other video
standard, or converted to HDR.
The AI upsampling preview can be set to HD or 4K, to upscale the video, select
any upsample or standard conversion with aspect ratio conversion in the
transform tab.
For example, when converting SD 4:3 to HD or 4K 16:9, the aspect ratio
conversion can be selected for zoom or black bars, or configured manually in
the aspect ratio dialog.
TIP: if “Auto” button is checked, the selected preview resample will be configured
automatically.
Upscaling and standards conversion
The AI configuration dialog deinterlace the videos for the preview.
When processing an interlaced video, the final video will be also interlaced, for
example, when AI enhance a 1080i video the final video will be 1080i.
To produce progressive videos, for example convert SD interlaced to HD 1080p
or 1080i to 4K progressive, simply select deinterlace in frame rate conversion
options.
Interlaced and progressive videos
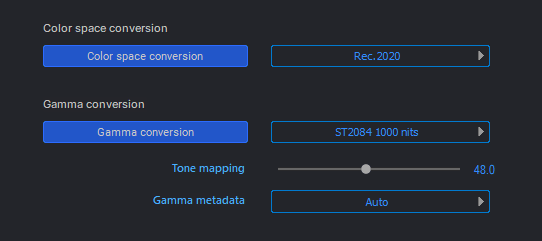
For converting SDR videos to HDR, for example HD to 4K HDR, configure the AI
enhancing and then select color space and gamma conversion to HDR in the
color tab, or configure the HDR conversion manually in the color dialog.
Then select a 10-bit encoder format, for example high quality DNxHR for editing
or storing, or HEVC HDR10 for the final video.
SDR to HDR conversions
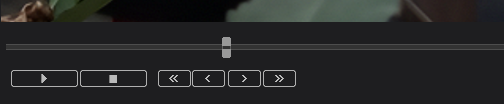
The video position slider can be dragged to a video frame, and when the
mouse button is released, the video frame will be processed with the selected
AI models.
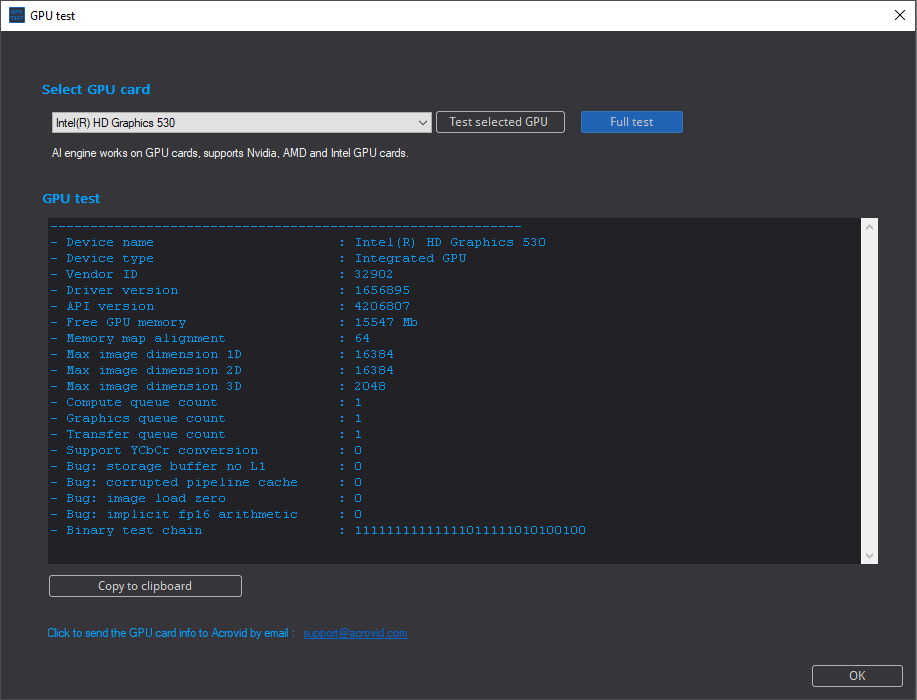
To test your GPU card, simply select it, and press the button “Test selected GPU”.
The full test is better to diagnostic problems, but it can freeze or crash if there is a GPU or driver problem, in this case uncheck the “Full test”
button.
The full test may take some time depending on the card model.
After the test is completed, press the button “Copy to clipboard” and paste directly on an email to “support@acrovid.com”
Alternatively, click over “support@acrovid.com” to create an email for sending to us.
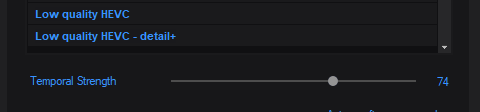
Configuring temporal strength
AI engine temporal processing uses several previous and next frames to process the
current frame.
The temporal strength can be configured manually, the minimum and default value
is 20, recommended for most videos.
Increase the temporal strength value to remove flickering, interlacing line flickering,
noise or fluctuations between frames.
It is recommended to create a preview to check the temporal strength value results.
DVD upscaled to HD - 100% crop
AI upscaled to HD, temporal strength 90 - 100% crop
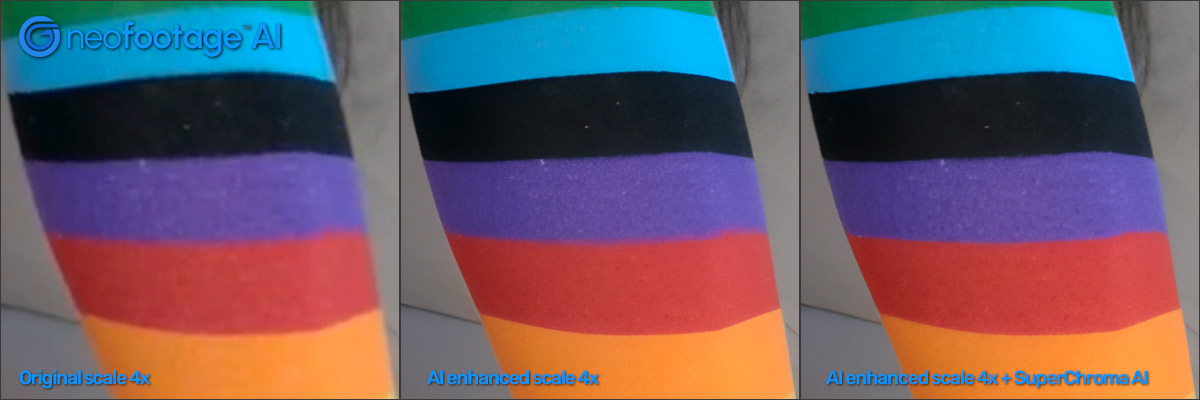
SuperChroma AI and SuperBitdepth AI can be activated alone or with other AI
processing settings.
For videos with chroma artifacts and posterization or banding, both can be
activated.
For detailed configuration information go to :
SuperChroma AI user guide
SuperBitdepth AI user guide
The AI models are organized in two groups:
•
Medium quality videos,
•
Low quality videos.
Depending on the video quality, select a medium or medium AI model.
After selecting a model, the result can be checked immediately in the current video
frame.
The base models for medium and low quality produce balanced results.
The models include film grain and detail+ versions:
•
The grain models preserve more film grain from the source videos and also
create new film grain.
•
The detail+ versions create more detailed results.
Additional models :
•
Denoise+ for medium quality videos, this model removes more noise than the
base model.
•
Deartifact+ for low quality videos, this model removes strong compression
artifacts.
•
Low quality HEVC : All models are trained for all video compression formats
including HEVC, the low quality HEVC model is trained specially for low bitrate
HEVC videos, removing strong HEVC artifacts.

Select the AI enhance tab to configure the global options :
In the AI global processing section, AI features can be activated for all videos without configuring in the AI enhance dialog.
For manually configuring SuperChroma AI and SuperBitdepth AI for each video, open the AI enhance configuration dialog.
Global SuperChroma AI : if activated, all videos processed will use SuperChroma AI for chroma enhancing by default.
If not activated, SuperChroma AI can be configured and activated in the AI enhance dialog.
Global SuperBitdepth AI : if activated, SuperBitdepth AI will be used automatically when a video bitdepth is upsampled.
For example, when processing 8-bit videos encoded with a 10-bit format, SuperBitdepth AI will be used automatically.
If not activated, SuperBitdepth AI can be configured and activated in the AI enhance dialog.
AI global processing
Configuring AI enhance
To configure AI enhance, select a video and press the button “Configure”, this will open the AI configuration dialog.
After configuring, check the button “Activate”, this will activate the AI processing.
AI enhance can be configured separately for each video, or configured
for all videos in the list.
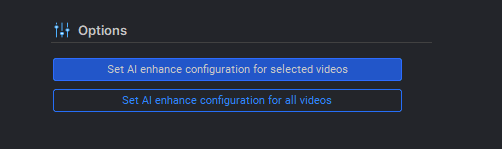
For configuring AI enhance for each video, set the “AI enhance configuration for selected videos” mode.
In this mode, each video can be configured with different AI settings. To configure a video, select it and open the AI enhance dialog.
If a video is not configured in the AI enhance dialog, then no AI processing will be applied to that video.
If the “AI enhance configuration for all videos” mode is selected, then the AI configuration will be applied to all videos.
In this mode, select a video, configure the AI processing, and this AI configuration will be applied automatically to all the videos.
Options
Tips and tricks
AI engine supports multiple models processing, all AI features can be
activated simultaneously.
Simply activate one or several AI features and check the result.
Processing with multiple AI models
For example, if the source video have chroma subsampling artifacts or chroma bleeding, activating also SuperChroma AI with AI
enhance can improve the video quality: