The basic differences between film and video are the frame rate, the motion blur, the film grain, and the gamma curve. Films are shot usually with a 180
shutter angle, equivalent to 1/48 shutter speed, this determines the characteristic film motion blur. Acrocode Studio Pro can add film blur when
downconverting frame rates to 24p, and for original 24p videos, motion blur can be added in video filtering.
To create a 24p video with film look the settings are:
•
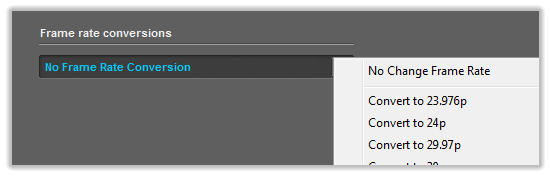
Convert to 24p if the original video was recorded in a different frame rate.
•
Motion blur.
•
Grain.
•
Cinetone filter.
Some steps are optional depending on how the original video was recorded,
for instance, it it is recorded using a 1/50 shutter speed (at 24p, 25p, 50i or 50p),
the original motion blur already matches the film blur.
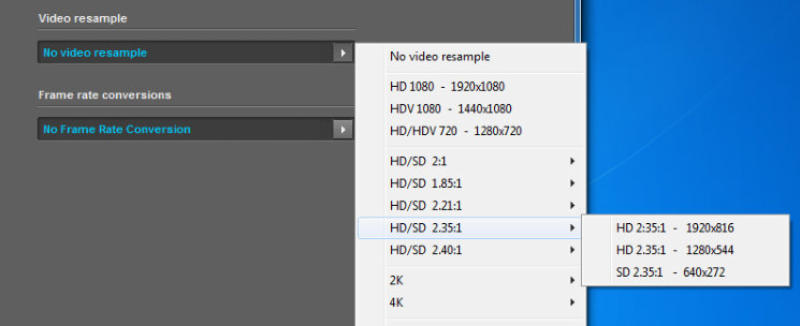
Additionally, you can select a output format with a film
aspect ratio like 2.35:1 or 1.85:1 in “Video Resample“ options.
TIP: Once you have configured the film conversion to your tastes, you can store it as a presetting. The presetting feature allows to store the current program
configuration for future uses, or save it to disk.
1: The basics
1a: Converting to 24p with motion blur
1b: Add film blur to 24p videos
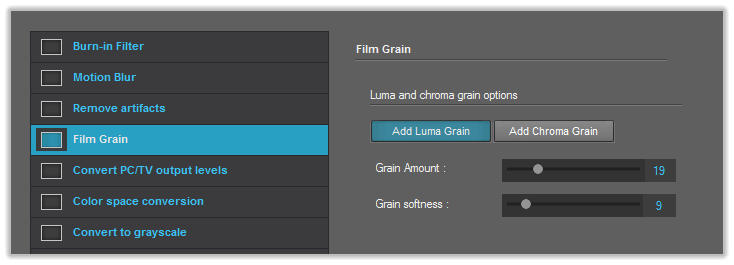
2: Film grain
If the original video frame rate is different than 24p, just set the convesion to 24p or 23.976 in frame rate conversions. The original original frame rate,
interlaced or progressive, will be converted to 24p using the best method :
I
If the video is shot originally at 24p, the best option is to directly set the camera shutter speed to 1/48 or 1/50. However if for any reason the video was shot
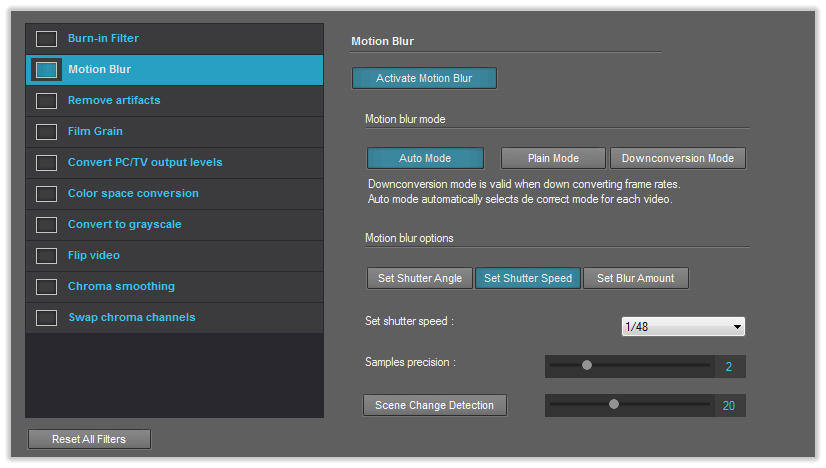
at low shutter speeds like 1/120, a motion blur filter can be added in video filters:
To configure the motion blur filter, set the blur amount by shutter angle, shutter speed or directly the blur amount.
In “Auto Mode” The motion blur filter will be configured automatically for normal motion blur or frame rate down-conversion motion blur.
The motion blur filter uses complex motion estimation methods, it works faster when using CUDA or OpenCL GPU processing.
The film grain filter adds film grain in luma or chroma components. To setup this filter, go to video filters and select the grain filter:
Then simply select the luma or chroma grain amount, usually a low luma grain of about 15-25 is enough for normal videos.
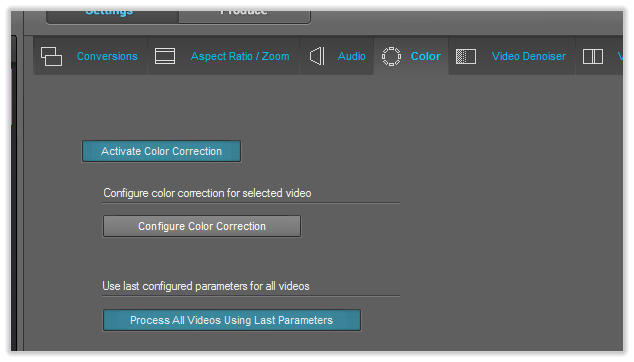
3: Cinetone filter and color correction
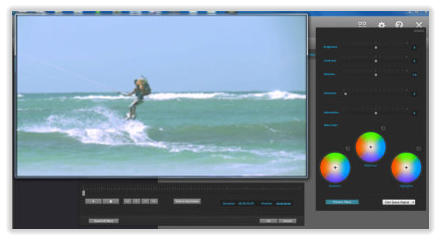
The Cinetone filter allows to imitate the film gamma curve. To add the cinetone filter select the color correction tab and open the configure dialog:
The enhance video preview dialog allows to configure the Cinetone Filter and also
perform color correction. To configure the cinetone filter simple set the
amount using the slider.
Aditionally, you can basically correct and enchance the video, or perform a
complete color correction.
For more information about cinetone and color correction please see the help file.
4: Produce the videos
Then just set the output format an encoder, the destination folder, and press the start button to get your 24p film look videos.
For more detailed information about these settings please see the program help file.
Copyright © 2022 Acrovid. All trademarks are property of their respective owners
Support
Products
Resources
About
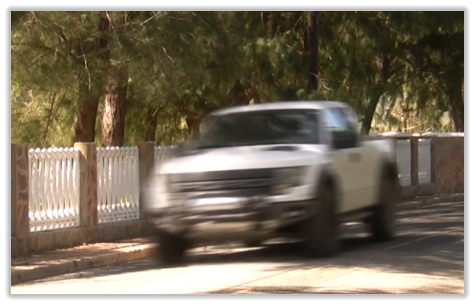
Without motion blur
With motion blur
Sign up for our newsletter to receive
news and special offers

Acrocode Studio Pro™ tutorial: producing 24p videos with film look

Press/Affiliates
Share